Forsaken Tips: 23 Wiki-Backed Tips for Survivors and Killers
Forsaken tips tied to wiki numbers: stamina drains 10/s, each generator puzzle cuts 2.4 s, Medkits heal 80 HP, LMS resets to 1:14. 23 tips incl. mobile.
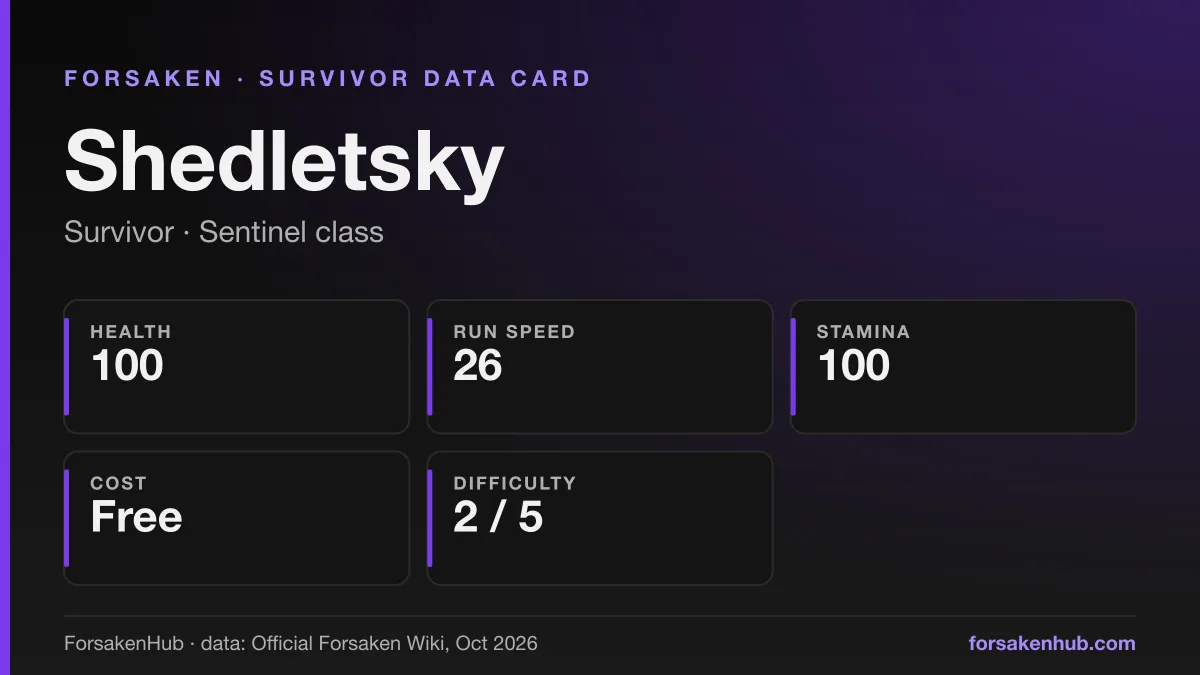
Shedletsky: health 100 · run speed 26 · stamina 100 · cost Free · difficulty 2 / 5. Data card by ForsakenHub from the Official Forsaken Wiki, October 2026.
A confession about Forsaken tips: most of the lists you will find online were written for a different game, and it shows. They tell you to time skill checks, drop pallets and wait by the exit gates, and none of those exist in Forsaken; they are Dead by Daylight vocabulary pasted onto a Roblox game with its own rules. So this page works the other way round. Every one of the 23 Forsaken tips below names the mechanic it relies on and the number the Official Forsaken Wiki publishes for it (read October 2026, starting from https://forsaken.wiki/Game_Mechanics): the 100-point stamina bar that drains at 10 per second, the five generator layers worth 2.4 seconds each, the Medkit that heals 80 HP over 7 seconds, the Last Man Standing clock that resets to 1:14. If a piece of advice could not be tied to a published value, it was left out. The tips run from first-week basics to the details that separate a decent player from a good one, grouped as survivor tips, killer tips, and settings and controls tips (mobile included), with a table at the end that lists every number in one place. If you are brand new, read our /blog/forsaken-beginner-mistakes-to-avoid alongside this, and keep the full /roblox-forsaken-guide open for anything this page does not cover.
Survivor tips
Every survivor shares the same movement numbers: walk speed 12, run speed 26, and a 100-point stamina bar. That holds for all 13 on the main roster, including Helperbot, the Support who joined as the 13th survivor on 16 October 2026 (Helperbot's wiki infobox lists the same 12/26/100). That shared baseline is why these eleven tips apply whoever you pick; the character differences live in health and abilities, not in how fast you move.
1. Sprint in bursts and stop before the bar hits zero
Sprinting drains 10 stamina per second, so a full bar of 100 buys about 10 seconds of running, and after a short pause it refills at 20 per second, roughly 5 seconds from empty. The trap is the bottom of the bar: draining it completely locks regeneration for 2 seconds, which is the worst possible moment to be stuck at walk speed 12. Let go a moment early and you skip the lock. Our /blog/forsaken-stamina-management-2026 guide works through the timing in more depth.
2. Never plan on winning a straight-line race
Every survivor runs at 26, and every killer runs faster: 27 for 1x1x1x1 and Guest 666, 27.25 for John Doe and Azure, 27.5 for Noli and Nosferatu, and 28 for c00lkidd and Slasher. Killers also carry 110 stamina that drains at only 9.5 per second, so they can out-sprint you even if you both start full. The gap is small, one or two studs per second, which means distance is lost slowly rather than all at once; use that time to reach a teammate, an ability or an item instead of simply holding sprint.
3. Think in generator layers, not whole generators
Since update 5.1.0 each generator is five Numberlink puzzles on a 7x7 grid, with between 2 and 13 wires to connect. Every finished layer takes 2.4 seconds off the round clock, a full generator takes 12 seconds, and all five generators remove 60 seconds. Because each layer pays out on its own, a single finished layer during a quiet moment is never wasted time. Up to three survivors can work one generator at once, from the front, left and right sides, so stacking three on one machine finishes it faster than three people spread across three. The puzzle-solving side is covered in /blog/forsaken-generator-puzzle-guide.
4. Keep your finger off sprint while you are on a generator
The Generator page lists three things that throw you out of the puzzle: taking damage, moving away, and holding the sprint button. When you re-enter, the wires are randomly generated again, so any half-drawn layer is gone. The first two are the killer's doing; the third is entirely yours, and it is the reason tip 20 suggests checking your sprint keybind.
5. Heal with the Medkit only when the killer is far away
The Medkit restores 80 HP but takes 7 seconds to use, and the wiki notes you are heavily slowed for the whole animation. Seven seconds of crawling within sight of a killer is an invitation, so heal after a chase ends, not during it. You cannot use one at full health (the game answers with 'Sharing is caring...'), Veeronica cannot use Medkits at all, and against Guest 666 a Medkit removes Hemorrhage but only heals up to the edge of the Hemorrhage texture.
6. Drink the Bloxy Cola before the chase, not in the middle of it
The Bloxy Cola takes 4 seconds to drink, during which you are heavily slowed, and then grants Speed II for 10 seconds. Speed adds 10% to walk and run speed per level, so Speed II lifts your 26 run speed to 31.2, faster than every killer's base run speed. A second cola only gives Speed I, any Slowness you receive cancels the Speed level for level, and during Last Man Standing the effect is set to Speed I regardless. If you play Noob, drinking a cola puts his own Bloxy Cola ability on a 50-second cooldown, so use the ability first.
7. Stay alive past the 60-second mark
Player Points, the currency that buys characters, skins and emotes, reward survival in steps: +25 for surviving to the end of a round, and +10 for dying only after living at least 60 seconds. A survivor who goes down in the first minute leaves those points on the table. The wiki also states that Player Points are never earned in private servers, so progress only comes from public rounds.
8. Space out your Sentinel stuns instead of stacking them
After a stun ends, the killer gets stun immunity, and Sentinel stacking adds 3 seconds of that immunity for every Sentinel survivor still alive. With several Sentinels in the round, a second stun thrown straight after the first may simply fail. Shedletsky's Slash stuns for 3 seconds on a 40-second cooldown and deals 30 damage; Guest 1337's Block (27-second cooldown) fully negates basic attacks only. Agree on who stuns next rather than firing at the same moment.
9. Plan Last Man Standing around the highlight rhythm
When only one survivor remains, the clock is set to 1:14 and you and the killer are highlighted to each other for 6 seconds, then again for 3 seconds in every 10-second interval. That opening highlight even bypasses the Undetectable status. Use the dark 7 seconds between highlights to change direction, because the killer last saw you where the highlight ended. Some pairings run longer: c00lkidd against 007n7 sets 1:28, Slasher against Guest 1337 1:25, 1x1x1x1 against Shedletsky 1:31, and John Doe against Jane Doe 1:39.
10. Against Noli, check that a generator is real before you sit on it
Noli's Prankster passive spawns 2 fake generators, raising the count to 7 for that round. Completing a fake puzzle gives you Hallucination and no reward or time reduction, and fully completing one resets it and applies Hallucination III. The wiki lists the tells: stained wires, glitching noises, a different shade of green on the progress bar, a missing wire number in the puzzle, and a reward message that reads 'Completed a generator objective' instead of 'Completed a generator puzzle'. Hallucination I alone makes the round timer appear closer to 0:00 than it really is, so do not panic at the clock.
11. Against Azure, walk past his plants and disarm them when it is safe
Azure's Echolocation passive means his plants are triggered by sound: sprinting or using an ability near one sets it off and reveals your aura to him for 3 seconds. Plants begin in a Blooming state for 40 seconds, during which they cannot be disarmed and Stigmatize Vines fire whenever a survivor comes near. Once a plant stops Blooming you can disarm it, which pays +5 Player Points and makes it inactive for 30 seconds, though disarming applies 2 stacks of Atropa to you.
Killer tips
Every killer on the current roster of eight shares one stamina profile (110 stamina, 9.5 per second drain, 21 per second regeneration), but their damage numbers differ, and that changes how many hits a survivor can take. These seven tips are about using the shared rules well; the per-killer detail lives on /forsaken-killers and the strength rankings on /forsaken-tier-list.
12. Sprint freely across the map; your stamina only drains near survivors
The Game Mechanics page states that killers only start losing stamina from sprinting once they are within 85 studs of a survivor, and only if the fastest path to that survivor is also under 120 studs. Crossing the map to a generator therefore costs nothing, and you arrive with the full 110. Inside that range a full bar lasts roughly 11.5 seconds at 9.5 per second, then refills at 21 per second.
13. Know your hits-to-kill before you choose a target
Basic attacks deal 20 HP for Slasher (25 while enraged), 1x1x1x1 and Guest 666, 22 for Azure, 24 for Nosferatu, 25 for Noli, 26.5 for c00lkidd and 28 for John Doe. Survivor health ranges from 60 for Jane Doe through 80 for Elliot and 100 for most of the roster to 110 for Guest 1337. That arithmetic matters: a 100 HP survivor takes five basic attacks from a calm Slasher but four from John Doe, while Jane Doe falls to three from anyone. The quickest kill on the map is usually the lowest-health survivor, not the closest one.
14. Trade generator time for kills; each kill is worth more
Killing a survivor adds 40 seconds to the round timer, while a whole generator only removes 12 seconds and all five together remove 60. One kill more than cancels three finished generators. The round's starting clock scales with the server: 3 minutes with four or fewer players, 3 minutes 30 seconds with five, and 4 minutes with six or more. Killing everyone also pays +40 Player Points, against +15 if time runs out first.
15. Punish anyone drinking or healing
Both items that spawn in public rounds slow their user heavily: the Medkit for its 7-second use and the Bloxy Cola for its 4-second drink. The wiki's own killer advice for both items is the same: that is the moment for your strongest ability, because the target cannot move away. As 1x1x1x1, an Entanglement on a healing or drinking survivor keeps them stuck or pulls them in.
16. Count the Sentinels before you commit to a chase
Five survivors are Sentinels: Shedletsky, Chance, Guest 1337, Two Time and Jane Doe. Each living Sentinel adds 3 seconds to the stun immunity you receive after a stun ends, so a lobby with three Sentinels gives you 9 extra seconds of protection after every stun. Once you know the immunity is running, that window is the time to press a chase you would otherwise back away from.
17. Use an ability, not a basic attack, into a Guest 1337 Block
Block only fully negates basic attacks. A successful block gives Guest 1337 +10 permanent overheal HP, resets his Punch cooldown, and slows you by 30% for 1 second, which is the setup for a Parry Punch that stuns for 2 seconds. A non-basic ability breaks the block immediately; that hit deals 40% reduced damage and he gains Resistance II for 3 seconds, but you avoid feeding him the parry.
18. Chase through map hazards that would slow a survivor
Killers suffer one less stack of Slowness from map hazards than survivors do. A hazard that applies Slowness II to a survivor gives you Slowness I, and a hazard that applies Slowness I does not slow you at all. Each Slowness level removes 10% of speed, so following a survivor through a Slowness I hazard turns a one-or-two-stud gap into a closing one.
Settings and controls tips
The Settings menu changes more than graphics. These five tips come from the wiki's Settings page, including the options that only apply on mobile and controller. One honest gap first: the wiki documents no separate mobile button layout or mobile-only movement rules, so a phone player uses the same stamina, generator and item numbers as everyone else. Performance-focused setups are covered in /blog/forsaken-best-settings-fps-boost-2026.
19. Turn on the Center Stamina Counter
By default the stamina bar sits at the bottom left of the screen. Center Stamina Counter shows your stamina in the middle of the screen along with your dynamic stamina regeneration, and Stamina UI Size scales it. Tip 1 depends on releasing sprint before 0, and that is far easier when the number is where your eyes already are.
20. Put sprint on a key you will not hold by accident
Keybinds can be changed for sprinting, Shift Lock, interacting, emoting, your main ability and each of your four alternative abilities. Because holding sprint exits a generator puzzle (tip 4), sprint should not share a key you rest a finger on while dragging wires. The same menu is where you would move interact if picking up a Medkit or Bloxy Cola feels awkward.
21. On mobile or controller, set up the crosshair and wire sensitivity
Crosshair Enabled only works on mobile devices and controllers, and it needs a Roblox texture ID entered in Crosshair ID before anything appears, which helps when aiming projectile abilities. Controller players also get Minigame Sensitivity, which adjusts cursor and wire speed on generators. Toggle Chargeable Abilities removes the need to hold the button for charge abilities such as Noli's Void Rush and Guest 666's Demonic Pursuit, useful on a touchscreen; the wiki flags Shiftlock Projectile Aiming as currently bugged.
22. On a weak phone or laptop, trim the effects first
Low Detail Mode reduces visuals across the game for performance, Particles Enabled can be switched off, Ragdoll Limit caps how many ragdolls render at once, and Smart Sound Cache deletes unused audio from memory after a set time. Preload All Assets is marked HEAVY: it slows loading in exchange for skins, models and audio not popping in, so leave it off on a low-memory device.
23. Keep the warning systems on
Heartbeat Visual and Heartbeat Sound show and play a heartbeat when you are close to a killer, an early warning that tips 1 and 2 depend on. Survivor UI Enabled shows the remaining survivors' status, and Health Display Type switches their health between raw HP and percentage, which tells you who needs your spare Medkit. If highlight outlines are hard to read, Display Auras Without Highlights replaces auras with icons above the tracked player.
The numbers behind the tips
Each row is one mechanic, the value the wiki publishes for it, and the tips above that rely on it. Compiled for this page from the individual wiki articles rather than copied from any single one.
| Mechanic | Value (as listed) | Wiki page | Used in tip |
|---|---|---|---|
| Survivor stamina | 100; sprint drains 10/s; regenerates 20/s; 2 s regen lock if fully drained | Game Mechanics | 1, 19 |
| Survivor movement | Walk 12, run 26 (every survivor, Helperbot included) | Character pages | 1, 2 |
| Killer run speed | 27 to 28 (Azure 27.25, 30 in Golem form) | Character pages | 2 |
| Killer stamina | 110; drains 9.5/s only within 85 studs of a survivor; regenerates 21/s | Game Mechanics | 2, 12 |
| Generator puzzle | 5 layers per generator, 7x7 grid, 2 to 13 wires (update 5.1.0) | Generator | 3 |
| Generator time value | -2.4 s per layer, -12 s per generator, -60 s for all five | Generator | 3, 14 |
| Generator seats | Up to 3 survivors (front, left, right) | Generator | 3 |
| Puzzle exits | Taking damage, moving away, holding sprint | Generator | 4, 20 |
| Round clock | 3:00 (4 or fewer players), 3:30 (5), 4:00 (6 or more) | Game Mechanics | 14 |
| Killer elimination | +40 s to the round timer | Game Mechanics | 14 |
| Medkit | +80 HP, 7 s use, heavily slowed while using | Medkit | 5, 15 |
| Bloxy Cola | 4 s drink, Speed II for 10 s; second cola Speed I; Speed I during LMS | Bloxy Cola | 6, 15 |
| Speed / Slowness | 10% per level; levels cancel one for one | Status Effects | 6, 18 |
| Player Points (survivor) | +25 survive the round; +10 die after 60 s; none in private servers | Player Points | 7 |
| Sentinel stacking | +3 s killer stun immunity per living Sentinel | Game Mechanics | 8, 16 |
| Shedletsky Slash | 3 s stun, 40 s cooldown, 30 damage | Shedletsky | 8 |
| Guest 1337 Block | Negates basic attacks only, 27 s cooldown; killer slowed 30% for 1 s | Guest 1337 | 8, 17 |
| Last Man Standing | Clock to 1:14; 6 s mutual highlight, then 3 s every 10 s | Last Man Standing | 9 |
| Noli fake generators | 2 extra per round (7 total) | Generator | 10 |
| Azure plants | Triggered by sprint or ability; Blooming 40 s; disarmed 30 s; +5 Player Points | Azure, Player Points | 11 |
| Killer basic attacks | 20 (Slasher, 1x1x1x1, Guest 666), 22 Azure, 24 Nosferatu, 25 Noli, 26.5 c00lkidd, 28 John Doe | Character pages | 13 |
| Survivor HP | 60 Jane Doe, 80 Elliot, 90 Builderman and Dusekkar, 100 most, 110 Guest 1337 | Character pages | 13 |
| Player Points (killer) | +40 kill everyone in time; +15 if not | Player Points | 14 |
| Map hazard Slowness | Killers take one stack less than survivors | Game Mechanics | 18 |
Source: Official Forsaken Wiki (forsaken.wiki), articles named in the third column, read October 2026. Values are reproduced as listed, including 26.5 and 27.25. The game publishes no win, escape or kill statistics, so none appear here.
Getting better from here
If you only remember three of these Forsaken tips, make them the stamina bar (release sprint before 0), the generator math (2.4 seconds per layer, so every layer counts), and the 40 seconds a killer gains per elimination, because those three numbers decide most rounds from either side. After that, improvement is character work: pick one survivor and one killer, learn their cooldowns from the wiki's character pages at https://forsaken.wiki/Characters, and practise their abilities in a private server knowing that Player Points do not accrue there. Browse /forsaken-survivors to choose a main, check /forsaken-tier-list to see where each killer stands in the current version, and return to the /roblox-forsaken-guide hub when a new update changes the numbers. When it does, we re-read the wiki and update this table rather than guessing.
Related Forsaken Guides
007n7 Forsaken Clone Guide: Teleport Timing & Endgame Plays (2026)
007n7 Forsaken guide: how to Clone with purpose, when to use the c00lgui teleport and Inject, and how to turn deception into generator progress.
All Forsaken Killers & Abilities 2026: Stats and Counters for All 8
All Forsaken killers in 2026, Azure included: every ability and cooldown for the 8, wiki run speed and HP, and the survivor kit that answers each one.
All Forsaken Maps 2026: Every Public & Private-Server Map Explained
All Forsaken maps in 2026 from the official wiki: 19 public maps with source game, creators and version, 11 private-server maps, 9 variants and rule changes.
Forsaken Game Mechanics Guide 2026 - Timer, Generators & Items
Forsaken game mechanics from the official wiki: the round timer, generator puzzles, stamina, Malice, Player Points, items, status effects and gamemodes.
Forsaken Controls & Keybinds Guide - PC, Mobile & Console (2026)
Forsaken controls and keybinds from the official wiki: every rebindable action, controller and mobile differences, and settings that change how abilities fire.
Back to the ForsakenHub homepage for the full Forsaken Roblox guide hub, or browse all guides. You can also play the game directly on Forsaken on Roblox.