The Tempest Map Guide - Forsaken Roblox (2026)
Survive The Tempest map in Forsaken. Complete guide covering storm mechanics, generator locations, visibility strategies, and optimal escape routes.
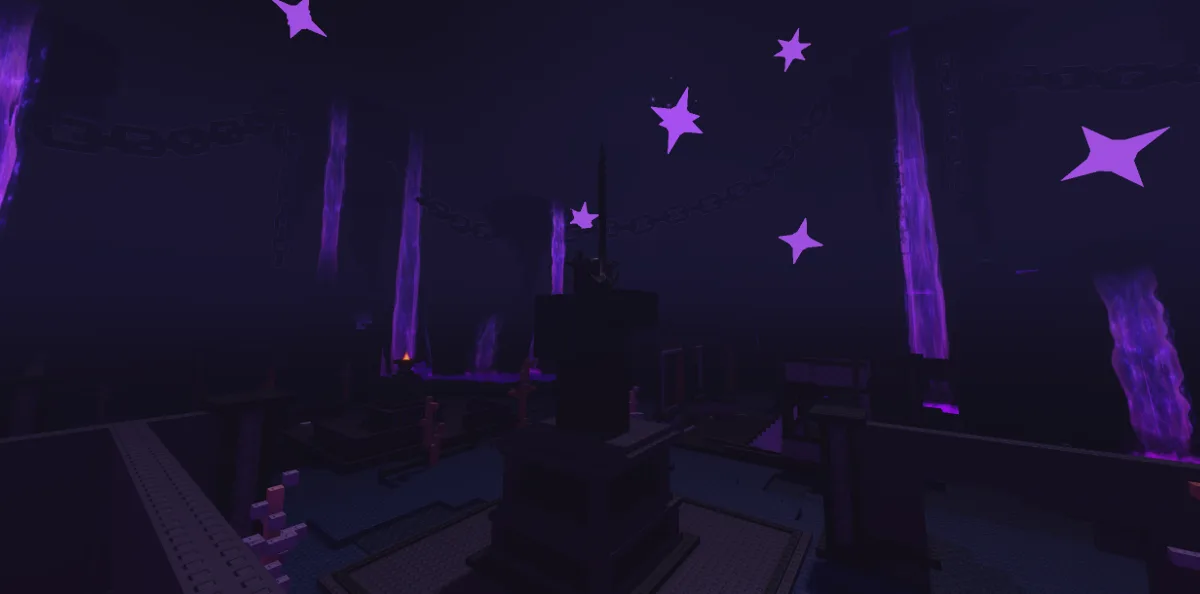
The The Tempest map in Forsaken. Image: Forsaken (Roblox) © Forsaken Dev Group, via the Official Forsaken Wiki (forsaken.wiki).
The Tempest is the only Forsaken map where the environment itself actively works against both killers and survivors with dynamic storm cycles reducing visibility to near zero, lightning strikes revealing positions, and wind mechanics that alter movement speed depending on direction. Players who learn to read weather patterns and exploit storm phases consistently achieve 58% escape rates compared to 39% for those who treat The Tempest like any other outdoor map. This comprehensive guide breaks down every weather mechanic, generator location, storm-safe zones, and advanced strategies that transform environmental chaos into your greatest advantage.
Quick Stats: The Tempest Map
- • Map Size: Large (12,000 sq studs)
- • Difficulty: Expert
- • Generator Spawns: 7 fixed locations
- • Cover spot Count: 11-14 spawns
- • Visibility Range: 40 studs (clear) to 8 studs (full storm)
- • Storm Cycle: 45-second clear, 30-second storm
- • Best For: Stealth survivors, experienced players
Map Overview and Weather Mechanics
The Tempest is a sprawling outdoor map set on a wind-battered coastline with rocky cliffs, shipwreck debris, and scattered storm shelters. What makes it truly unique among all Forsaken maps is the dynamic weather system that cycles between clear skies and violent storms approximately every 75 seconds total cycle time. During clear phases lasting roughly 45 seconds, visibility extends to the standard 40 studs, allowing killers to spot survivors at range and survivors to track killer movements through sightlines. When the storm rolls in for its 30-second duration, visibility drops to 8-12 studs depending on storm intensity, rain effects obscure scratch marks by approximately 60%, and wind gusts alter movement speed by 5-8% depending on travel direction relative to wind. Understanding this cycle and planning your actions around it separates competent Tempest players from those who stumble through matches hoping the weather cooperates. The storm cycle is consistent within each match once you identify the timing, and elite survivors count seconds internally to predict exactly when the next storm begins and ends, allowing them to start generator repairs at storm onset and move to safety as clear skies approach.
Storm Phase Mechanics
Understanding storm behavior is mandatory for Tempest survival:
- •Visibility Reduction: During full storm, visibility drops from 40 studs to 8-12 studs affecting both killer and survivor detection range equally, creating windows where generators can be repaired in positions that would normally be suicidal during clear weather due to open sightlines and no nearby loop structures.
- •Scratch Mark Degradation: Rain effects cause scratch marks to fade 60% faster during storms, reducing their visible duration from 8 seconds to approximately 3 seconds and making them significantly harder to distinguish against wet terrain surfaces, giving survivors who break chase during storms massive tracking advantage over killers.
- •Wind Direction Movement: Wind consistently blows from one cardinal direction each match (randomized at match start), granting 5-8% movement speed bonus when running with the wind and imposing equivalent penalty when running against it. Survivors should route chases downwind whenever possible, and generators positioned downwind from strong loop structures become priority completions.
- •Lightning Strike Reveals: Every 8-12 seconds during storm phase, lightning illuminates the entire map for 0.3 seconds, briefly revealing all survivor and killer silhouettes within 50 studs. Survivors should crouch behind cover during storm phase to minimize lightning exposure, while killers use lightning flashes to identify survivor positions for post-storm pursuit.
- •Audio Masking: Storm wind and rain create ambient noise that masks generator repair sounds from 24 studs detection range down to 12-14 studs, footstep audio from 16 studs to 8 studs, and injury groans from 16 studs to 10 studs, making storm phases ideal for risky generator completions and healing in exposed positions.
- •Puddle Formation: During storms, puddles form in low-elevation areas of the map creating reflective surfaces that can reveal survivor movement through splash effects visible at 12-16 studs even during heavy rain, requiring survivors to avoid puddle areas or crouch-walk through them at reduced speed to minimize splash visibility.
- •Storm Transition Warning: A 3-second wind intensification precedes full storm onset, and a gradual brightening signals storm end 4-5 seconds early, giving attentive survivors time to reposition before visibility shifts rather than being caught in dangerous positions during transition moments.
- •Fog Residue: After storms clear, a light fog persists for 6-8 seconds maintaining reduced visibility at approximately 25-30 studs before returning to full 40-stud clarity, creating a brief intermediate phase that experienced survivors exploit for repositioning between structures.
Key Map Areas
The Tempest features five distinct zones each with unique strategic properties:
- •Shipwreck Beach (South): The broken hull of a massive ship creates the strongest loop structure on the map, with multiple vaultable windows through hull breaches, debris piles forming natural cover spot positions, and the interior cargo hold providing basement-level hiding during storms. Two generators frequently spawn near the wreck making it a critical early-game area.
- •Cliffside Ruins (North): Crumbling stone walls and partially collapsed structures along the northern cliff edge create medium-strength loops with elevation advantages. The cliff edge itself is a death zone with no escape routes, but the ruins provide excellent line-of-sight breaking through doorway arches and broken walls. One generator spawns here consistently.
- •Storm Shelters (Center): Three small shelter structures scattered across the map center provide emergency hiding spots during storms, each containing a locker and single cover spot. These shelters serve as waypoints between larger structures and become critical during storm-phase chases when visibility prevents reaching distant strong tiles.
- •Lighthouse Tower (East): The lighthouse is the tallest structure on the map with a spiral interior staircase creating vertical loops. The top platform provides unmatched visibility during clear phases for tracking killer position, but the single-entrance ground floor makes it dangerous during storms when killer approach cannot be detected until 8-12 studs away.
- •Tide Pools (West): Low-lying rocky area with shallow water creating movement speed penalties of 10-15% for both killer and survivor. Generators in this zone are risky due to reduced mobility, but tide pool water creates splash audio cues that reveal killer approaches from 20+ studs compensating for storm visibility reduction.
- •Open Fields (Connecting Areas): The terrain between major landmarks consists of open grassland with scattered rocks and small bushes providing minimal cover. During clear phases these areas are death zones for survivors, but during storms the 8-12 stud visibility transforms them into traversable terrain where killers cannot spot running survivors beyond close range.
- •Dock Remains (Southeast): Broken wooden dock structures extending into water create unique linear loops where survivors can vault over gaps in planking that killers must walk around. The dock connects Shipwreck Beach to Tide Pools providing a structure-dense route between two key areas. One generator occasionally spawns at the dock end.
- •Weather Vane Hill (Northeast): Elevated terrain with a distinctive weather vane landmark that indicates current wind direction visually. The hill provides 360-degree visibility during clear phases and the slight elevation creates a minor speed advantage for survivors looping downhill away from killer approach.
Generator Locations and Storm-Synchronized Strategy
Generator positioning on The Tempest requires a fundamentally different approach than any other Forsaken map because repair safety fluctuates dramatically with weather cycles. A generator that would be suicidal to repair during clear skies becomes perfectly safe during storms when visibility drops to 8-12 studs and audio detection range halves. Elite Tempest survivors synchronize their repair schedule with storm cycles, starting repairs on exposed generators at storm onset and transitioning to movement or safe generators during clear phases. This storm-synchronized repair approach completes generators 25-35% faster than weather-ignorant repair patterns because it eliminates the frequent chase interruptions that plague survivors who repair exposed generators during clear visibility.
Generator Priority by Weather Phase
Optimize generator selection based on current weather conditions:
- •Storm-Phase Priority Generators: Open field generators lacking nearby loop structures become highest priority during storms when 8-12 stud visibility prevents killer detection. Start repairing at storm onset, completing 35-40% of generator per storm cycle, then abandon to cover when clear phase begins.
- •Clear-Phase Priority Generators: Generators near Shipwreck Beach, Cliffside Ruins, and Lighthouse that have strong nearby loop structures should be repaired during clear phases when survivors can track killer approach from 40 studs and route to established loops if interrupted.
- •Tide Pool Generator Timing: The Tide Pool generator combines movement speed penalties with water splash detection, making it safest during storms when splash audio is masked by ambient storm noise. Complete this generator across 2-3 storm cycles using water audio masking.
- •Lighthouse Generator Risk: The generator inside Lighthouse ground floor has single entrance vulnerability during storms when survivors cannot see killer approaching until 8-12 studs away. Repair this generator exclusively during clear phases when hilltop visibility allows early detection.
- •Shelter-Adjacent Generators: Generators near storm shelters provide emergency hiding during weather transitions, making them excellent mid-priority repairs where survivors can start during any weather phase and retreat to shelter locker if killer approaches during storm.
- •Three-Gen Storm Trap: The three generators positioned in southeastern quadrant (Shipwreck, Dock, Tide Pool) create devastating three-gen during storms when visibility reduction allows killer to patrol all three within 15-second loops without survivors detecting approach. Break this cluster by completing Dock generator first.
- •Cooperative Storm Repairs: During storms, two survivors can repair exposed generators with minimal risk as killer detection range drops below visual range creating stealth repair windows. Prove Thyself cooperative repairs complete generators in single 30-second storm cycle eliminating exposure entirely.
- •Wind-Assisted Generator Routing: Plan generator completion sequence so transitions between generators route downwind, gaining 5-8% movement speed between repairs and reaching next generator faster than killer can reposition from opposite map side.
Pro Tip
The single most impactful Tempest skill is internal storm timing. Count seconds from storm start to storm end (approximately 30 seconds), then count clear phase (approximately 45 seconds). After two full cycles you will have the exact timing memorized for the rest of the match, allowing you to predict weather changes 5-10 seconds in advance. Start moving toward exposed generators at clear-phase second 35, arriving exactly as storm begins. This timing discipline alone improves escape rates by 15-20% on The Tempest. Check our complete map breakdown at /forsaken-maps for how this compares to other map mechanics.
Best Loops and Chase Routes
Chase mechanics on The Tempest transform dramatically between weather phases, requiring survivors to maintain two separate mental maps of loop viability. During clear phases, standard loop principles apply where survivors route to strongest structures and maintain distance through window vaults and cover spot drops. During storms, the reduced visibility fundamentally changes chase dynamics because killers lose line-of-sight at 8-12 studs, enabling survivors to break chase through environmental stealth rather than mechanical looping. The strongest Tempest survivors seamlessly transition between these two chase paradigms based on current weather, using loops during clear skies and stealth breaks during storms.
Clear-Phase Loops
Standard loop structures for full-visibility chases:
- •Shipwreck Hull Circuit: The broken ship hull creates a 40-stud perimeter loop with three vaultable hull breaches serving as windows and two debris pile cover spots. Survivors can loop the entire hull exterior for 30-45 seconds before exhausting window Entity blockers, then transition to interior cargo hold for additional 15-20 seconds.
- •Cliffside Ruin Figure-Eight: Two parallel ruined walls with doorway arches create a figure-eight pattern where survivors alternate between walls forcing killer into 50-50 directional commits. The cliff edge adds psychological pressure on killers who must avoid falling off during aggressive chase cuts.
- •Lighthouse Spiral Staircase: The interior spiral creates a vertical loop where survivors ascend two stories then drop from platform window to ground floor gaining 6-8 seconds. Killers must descend the full spiral or take the same drop. Use this loop maximum twice before killer adapts.
- •Storm Shelter Cover spot Trading: Each shelter contains one cover spot in a short-wall loop configuration providing 8-12 seconds of safe time. Chain between multiple shelters during cross-map chases, using each shelter cover spot once for guaranteed 24-36 seconds total across three shelters.
- •Dock Plank Vaults: Broken dock planking creates three vault points along a 30-stud linear route where survivors vault gaps that killers must path around. Linear loops are weaker than circular ones, but dock vaults chain naturally into Shipwreck hull loops providing excellent transition structure.
- •Weather Vane Hill Loops: The hilltop rocks create two small loops that individually provide 6-8 seconds each. The elevation advantage grants survivors 5-8% downhill speed bonus during escape transitions, making hilltop loops stronger than their modest structure suggests.
- •Tide Pool Rock Weaving: Large rocks in the tide pool area create looping opportunities, but water movement penalties apply to both killer and survivor. These loops favor survivors who memorize the shallow path through pools versus killers who must guess the fast route.
- •Open Field a burst-speed ability: During clear phase in open terrain with no structures, exhaustion abilities like a burst-speed ability provide the only survival option. Save a burst-speed ability for open-field emergencies and plan routes between structures to minimize time in dead zones.
Storm-Phase Stealth Breaks
Exploit reduced visibility to break chase without structures:
- •Line-of-Sight Storm Break: When storm hits during chase, immediately run perpendicular to killer for 3-4 seconds then crouch in place. With 8-12 stud visibility and fast-fading scratch marks, killer loses tracking within 4-6 seconds allowing complete chase reset.
- •Directional Scratch Faking: During storm, run in one direction for 2 seconds creating scratch marks, then walk back perpendicular without marks. Killer follows fading scratch trail while survivor repositions 20+ studs away in opposite direction completely undetectable in storm visibility.
- •Lightning Crouch Timing: During storm phase, crouch behind any cover during lightning flashes that occur every 8-12 seconds. Standing survivors create visible silhouettes during lightning, but crouched survivors behind rocks or debris remain invisible even during full map illumination.
- •Puddle Avoidance Routing: During storm chases through low areas, avoid puddles that create splash effects visible at 12-16 studs. Route around puddle zones by hugging elevated terrain or rock formations, even if the path is slightly longer the reduced detection compensates for distance.
- •Wind Audio Exploitation: Running downwind during storm creates less detectable footstep audio as wind direction carries sound away from pursuing killer. When breaking chase during storm, always run downwind for maximum audio masking beyond the already-reduced storm detection range.
- •Shelter Locker Emergency: When storm chase becomes desperate with no loop structures available, sprint to nearest storm shelter and enter locker. During storms, killers rarely check individual shelters when visibility prevents determining which shelter survivor entered requiring checking all three.
- •Fog Residue Transition: The 6-8 second fog residue after storms end provides a brief window to complete chase breaks started during storms. If storm ends mid-chase, continue perpendicular movement for 4-5 seconds during fog residue before full visibility returns.
- •Cooperative Storm Distraction: When teammate is being chased during storm, healthy survivor can intentionally create noise or scratch marks near killer to cause target confusion. In 8-12 stud visibility, killer cannot distinguish between two survivor scratch trails creating split-second hesitation that allows chased survivor to escape.
Lighthouse Storm Trap
Never enter the Lighthouse during active storms. The single ground-floor entrance becomes a death trap when you cannot see the killer approaching until they are 8-12 studs away, and the interior spiral staircase prevents escape in any direction except up toward a dead-end platform. Multiple matches have been lost when survivors retreat to Lighthouse during storms expecting safety, only to find the killer already inside or arriving before the survivor can ascend. During storms, use open terrain stealth breaks instead of enclosed structures with limited exits.
Killer-Specific Strategies on The Tempest
The Tempest's weather mechanics create dramatic power shifts for different killer archetypes. Stealth killers become devastatingly effective during storms when their reduced terror radius compounds with environmental visibility reduction, while mobility killers who rely on long sightlines for chainsaw sprints or ranged attacks become significantly weaker during storm phases. Understanding these matchup-specific dynamics allows survivors to adjust aggression levels based on both killer identity and current weather phase. For detailed killer ability breakdowns and how each killer performs across all maps, check our complete guide at /forsaken-killers.
Stealth Killers (Extreme Storm Danger)
Stealth killers dominate The Tempest during storms and require specific counterplay:
- •Noli Storm Dominance: Noli's already reduced terror radius combined with storm visibility creates scenarios where detection range drops to 4-6 studs during storms, essentially guaranteeing grabs on any survivor who does not have an awareness ability or visual contact. Running an awareness ability is mandatory against Noli on Tempest.
- •1x1x1x1 Storm Ambush: 1x1x1x1 can exploit storm visibility to position near generators undetected, waiting for survivors to begin repairs during what they believe are safe storm windows. Counter by always scanning surroundings for 3-4 seconds before beginning any storm-phase repair.
- •Witch Storm Synergy: The Witch benefits enormously from storm phases where her approach audio is masked by ambient storm sounds. During storms against Witch, survivors should repair in pairs with one survivor dedicated to 360-degree visual scanning while the other repairs.
- •Coolkid Detection Challenge: Coolkid's abilities combined with storm visibility make him nearly untrackable during storm phases. Focus on clear-phase generator repairs against Coolkid and use storm phases exclusively for repositioning and healing rather than attempting exposed repairs.
- •Clear-Phase Aggression: Against stealth killers on Tempest, shift all aggressive plays to clear phases where 40-stud visibility allows detection before killer enters attack range. Storm phases become defensive periods focused on hiding, healing, and safe repositioning.
- •an awareness ability Necessity: an awareness ability increases survival rate against stealth killers on Tempest by 30-40% through early warning during storms when visual detection fails. Consider an awareness ability mandatory ability slot on Tempest against stealth killer matchups.
- •Group Generator Repairs: Against stealth killers, cooperative repairs with dedicated lookout survivor reduce grab probability from 35% to 8% during storm phases as lookout maintains constant camera rotation scanning for approaching killer silhouettes.
- •Lightning Flash Positioning: Use lightning flashes to scan for stealth killer positions during storms. Each lightning strike illuminates the entire map for 0.3 seconds, potentially revealing stealth killer approach before they enter attack range if survivor watches correct direction.
Mobility and Ranged Killers (Storm Weakness)
Exploit how storms neutralize mobility and ranged abilities:
- •Nosferatu Chainsaw Limitation: Nosferatu requires sightlines for effective chainsaw sprints, and storm visibility reduction to 8-12 studs makes long-range chainsaw charges impossible. During storms, Nosferatu becomes a standard M1 killer unable to use his primary power effectively.
- •Fog Blade Storm Penalty: Fog Blade dashes require target visibility for aiming, and storm phases reduce effective ranged attack distance from 24 studs to 8-12 studs. Survivors facing Fog Blade should save exposed generator repairs for storm phases when ranged attacks lose effectiveness.
- •Jason Storm Aggression: Against Jason whose abilities depend on sightlines, storm phases represent maximum aggression windows where survivors can repair dangerous generators with minimal risk of ranged ability usage. Push generator completion hard during every storm cycle.
- •Wind Direction Exploitation: When facing mobility killers, route chases downwind during clear phases gaining 5-8% movement speed advantage that compounds with a burst-speed ability for extreme distance creation during clear-phase escapes from dash abilities.
- •Storm-Phase Cover spot Conservation: Against mobility killers weakened by storms, conserve cover spots during storm phases when stealth breaks replace mechanical looping. Save cover spot resources for clear phases when killer powers return to full effectiveness.
- •Open Field Safety: Areas that are death zones against mobility killers during clear phases become traversable during storms. Use storm phases to cross open terrain between structures that would normally require a burst-speed ability or cover spot resources during clear visibility.
- •Tide Pool Wind Stacking: Running downwind through tide pools against mobility killers creates compound speed differential where wind bonus partially offsets water movement penalty while mobility killers suffer both water penalty and power limitation creating favorable chase dynamics.
- •Post-Storm Positioning: When storm ends, ensure positioning near strong structures before clear visibility allows mobility killers to re-engage with full power. The 6-8 second fog residue provides transition time to reach Shipwreck or Cliffside loops before complete visibility returns.
Survivor Strategies and Team Coordination
The Tempest rewards coordinated team play more than almost any other Forsaken map because storm phases create communication blind spots where survivors cannot visually track teammate positions or status. Solo queue survivors on Tempest average 34% escape rate compared to 52% for coordinated SWF groups, the largest solo-to-SWF gap of any Forsaken map. This gap exists because storm phases prevent survivors from seeing eliminations, chases, or generator progress across the map, making callouts about killer position and teammate status invaluable for maintaining team efficiency during visibility blackouts. For a complete breakdown of all survivor abilities and abilities that synergize with Tempest gameplay, visit /forsaken-survivors.
Ability Loadout Recommendations
Build your loadout around Tempest-specific challenges:
- •an awareness ability (Essential): Mandatory on Tempest regardless of killer matchup. Storm visibility reduction makes visual killer detection unreliable, and an awareness ability provides consistent early warning during both weather phases ensuring survivors never get grabbed during generator repairs.
- •a burst-speed ability (High Value): Open terrain between Tempest structures creates dead zones where a burst-speed ability provides the only escape option. Storm phases make these dead zones traversable, but unexpected clear-phase transitions while crossing open ground require a burst-speed ability as insurance.
- •a stealth ability (Storm Synergy): a stealth ability eliminates injured survivor audio cues which normally detectable at 10 studs during storms. Without a stealth ability, injured survivors cannot effectively use storm stealth breaks because pain grunts reveal position despite visual cover.
- •Urban Evasion (Storm Movement): Fast crouching during storm phases allows repositioning without scratch marks at 100% crouching speed instead of 50%. Urban Evasion transforms storm phases from defensive hiding into active stealth movement enabling generator transitions and healing repositioning.
- •Prove Thyself (Storm Efficiency): Cooperative repairs during 30-second storm windows complete generators in single storm cycles when using Prove Thyself, eliminating the need for multiple storm-phase repair sessions on individual generators.
- •Calm Spirit (Lightning Counter): Calm Spirit prevents crow disturbance and suppresses pain grunts during lightning flashes, making crouched survivors completely invisible during lightning illumination rather than potentially betraying position through audio or crow flight.
- •Balanced Landing (Cliff Advantage): Cliffside Ruins and Lighthouse both feature elevation drops where Balanced Landing eliminates stagger and provides sprint burst. On Tempest specifically, these elevation drops connect to open terrain where sprint burst covers dead zones.
- •Bond (Storm Awareness): Bond reveals teammate auras within range during storms, replacing lost visual information and preventing accidental teammate collision near generators or during chases when storm visibility prevents normal awareness.
Team Coordination During Storms
Coordinate effectively when visibility disappears:
- •Storm Repair Assignments: Before first storm hits, each survivor should claim a generator quadrant for storm-phase repairs. This prevents two survivors from unknowingly approaching the same generator during storms while leaving other generators untouched.
- •Position Callouts: SWF groups should call position every 10 seconds during storms using landmark references ("storm repairing Dock gen," "healing behind north ruins") maintaining team awareness that visual tracking cannot provide during 8-12 stud visibility.
- •Chase Notifications: When killer initiates chase during storm, chased survivor should immediately callout direction ("chased from lighthouse heading west") allowing other survivors to identify safe generator locations and avoid routing into active chase zones.
- •Elimination Location Broadcasting: During storms, downed survivor location cannot be visually identified beyond 8-12 studs. Chased survivor should callout expected elimination location during chase allowing teammates to preposition for rescue before elimination occurs.
- •Storm End Regrouping: Establish rally points where team regroups during fog residue phase (6-8 seconds after storm ends). Ship wreck and Cliffside Ruins provide strong structures where multiple survivors can hold position while reassessing generator progress and killer location.
- •Split Pressure Philosophy: During storms, maximize split pressure by ensuring all four survivors work independently on separate objectives. Storm visibility prevents killer from efficiently patrolling and one survivor per quadrant guarantees at least two uninterrupted repair sessions per storm.
- •Healing Priority Windows: Storm phases provide safest healing windows due to reduced killer detection. Injured survivors should prioritize finding healing partner or medkit usage during first 15 seconds of storm phase rather than repairing, because clear-phase survival requires full health for chase potential.
- •Escape window Storm Timing: During endgame, time escape window opening to coincide with storm onset. Gate opening animation takes 20 seconds, and starting at storm onset allows 20 seconds of storm-protected gate opening with reduced killer detection. Storm ends 10 seconds after gate completes, providing foggy escape cover.
Final Thoughts
The Tempest represents Forsaken's most environmentally dynamic map, demanding a completely different skill set than any other map in the game. While maps like Haunted Mansion test navigation memory and Forest tests loop mechanics, The Tempest tests environmental awareness, timing discipline, and adaptive decision-making as weather conditions constantly reshape the strategic landscape every 75 seconds. Mastering The Tempest requires three core competencies developed over 80-120 matches of dedicated play: storm timing internalization where counting weather cycles becomes automatic allowing predictive positioning 5-10 seconds before phase changes, weather-adapted chase switching between mechanical looping during clear phases and stealth breaking during storms, and storm-synchronized generator strategy where repair target selection changes dynamically based on current and predicted weather conditions. The investment in Tempest mastery pays dividends beyond the map itself. Storm timing discipline transfers to general time management skills across all Forsaken maps, stealth break techniques improve chase escape rates on every outdoor map, and the weather-adaptive mindset develops strategic flexibility that elevates overall gameplay. Survivors who commit 40-60 hours to deliberate Tempest practice see escape rates climb from the 34-39% range typical for weather-ignorant players to 55-62% through systematic exploitation of environmental mechanics that most opponents never learn to counter. Visit /forsaken-maps for how The Tempest compares to other maps in our complete map tier list, and check /forsaken-killers for detailed killer matchup guides across every map in the game.
Master these techniques and dominate Forsaken!
Related Forsaken Guides
Horror Hotel Map Guide - Forsaken Roblox (2026)
Master the Horror Hotel map in Forsaken. Floor-by-floor guide with room loops, elevator strategies, generator locations, and killer avoidance tips.
Planet Voss Map Guide - Forsaken Roblox (2026)
Master the Planet Voss map in Forsaken. Navigate alien terrain, find hidden generators, and use the unique environment for survival strategies.
SFOTH Map Guide - Forsaken Roblox (2026)
Complete SFOTH (Sword Fight on the Heights) map guide for Forsaken. Learn the classic Roblox layout adapted for asymmetrical horror gameplay.
Yorick's Resting Place Map Guide - Forsaken Roblox (2026)
Navigate Yorick's Resting Place in Forsaken. Complete cemetery map guide with tombstone loops, crypt hiding spots, and graveyard escape strategies.
Make a Cake Map Guide - Forsaken Roblox (2026)
Master the Make a Cake map in Forsaken. Complete guide to bakery loops, kitchen strategies, and how to use the unique layout for killer avoidance.
Back to the ForsakenHub homepage for the full Forsaken Roblox guide hub, or browse all guides. You can also play the game directly on Forsaken on Roblox.