John Doe Forsaken Guide 2026: All Abilities, 3 Folders & Counter
John Doe in Forsaken 2026: all 4 abilities, where to find the 3 folders, Corrupt Energy timing, and the best survivor counter ranked by win rate.
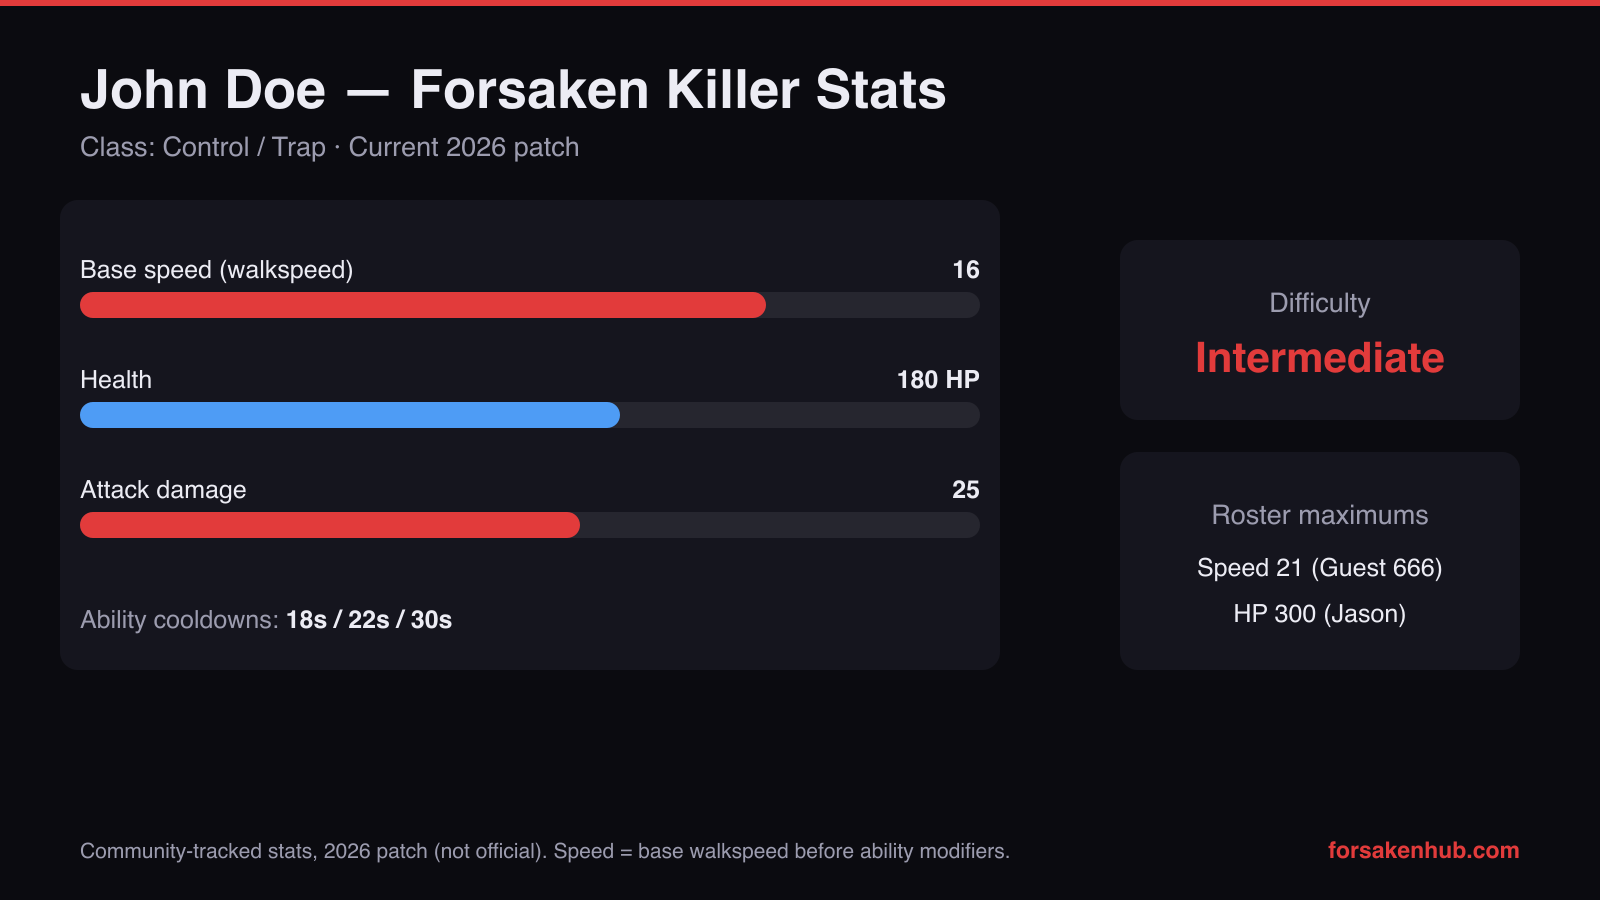
John Doe's stats from the Official Forsaken Wiki (September 2026). Chart by ForsakenHub.
John Doe is a “setup-to-snowball” killer: your best games come from early map control (traps/space denial) that converts into fast downs once survivors start panicking. A lot of players try to run John Doe like a pure chase killer, then wonder why their pressure feels inconsistent. The truth is simple: John Doe is at his strongest when you spend the first minute building a trap network and forcing survivors into predictable lanes. This guide breaks down the tools (with the numbers the community tracks), shows the 3 trap patterns that consistently generate hits, and explains how survivors counter you so you stop wasting time on “obvious” placements.
Quick Stats: John Doe (Official Forsaken Wiki)
- • Unlock Cost: 1,000 Player Points
- • Basic Attack: 28 damage
- • Corrupt Energy Cooldown: ~18s (spike wall)
- • Digital Footprint: false-shadow trap — Corrupted I and Slowness II on the survivor, Speed I for you, mutual aura reveal for 10 s
- • Best Strength: Turning safe travel lanes into guaranteed damage
- • Biggest Weakness: Over-chasing without refreshing your trap network
Focus on how often the player leaves chase to refresh setups—John Doe wins by controlling the map, not by “never letting go”.
John Doe Kit Table (Practical Use)
John Doe has fewer “flashy” buttons than Nosferatu, but each tool is high leverage if you treat it like a map-control kit.
| Tool | Cooldown / Limit | What It Does | Best Use | Common Survivor Response |
|---|---|---|---|---|
| Basic Attack (M1) | N/A | Your consistent damage source. | Swing only when you’ve already forced a bad route with walls/traps. | Corner cuts, baiting swings, and forcing you into long loops. |
| Corrupt Energy | ~18s | Spawns a spike wall to deny lanes and force pathing. | Place it to cut the “safe” line to a window or cover so the survivor must turn early. | Double-backs and early pre-rotations to avoid being committed when the wall appears. |
| Digital Footprint | Max 3 active | Trap/mark tool that punishes predictable routes. | Cover rescue approaches, common hallway corners, and the “return line” after survivors split. | Stop running straight, slow-walk corners, and bait traps before committing. |
If you only remember one rule: don’t spend Corrupt Energy reactively at random—spend it when the survivor is committed to a lane.
The John Doe Game Plan (First 90 Seconds)
The easiest way to throw a John Doe match is to sprint into the first chase you see and ignore setup. Your first minute should create a “trap triangle” that keeps survivors inside a smaller area.
Step 1: Place 2 Footprints Before Your First Real Chase
Two early traps are worth more than one early hit because they keep paying you back all match.
- •Place your first Digital Footprint on the most direct route between two objectives (the lane survivors must run to rotate).
- •Place your second on the most common rescue approach line (the path people take to help without being seen).
- •Avoid “obvious” placements directly on top of objectives; good survivors will sweep those first.
- •Once two are placed, start chase—but choose a chase that leads back into your trap triangle.
- •If your chase runs away from your network, you are helping the survivors by pulling yourself to the wrong side of the map.
Step 2: Use Corrupt Energy to Remove One Clean Option
Corrupt Energy isn’t about surprise; it’s about forcing predictable turns.
- •Wait until the survivor commits to a lane (window line, long corridor, straight road), then wall it.
- •Your goal is to force an early turn that sends them into your pre-trapped routes.
- •If the survivor immediately turns away, take the free distance and swing only when the hit is guaranteed.
- •If the survivor is a strong looper, do not try to “out-loop” them—force them to leave the tile and run into your setups.
- •Every Corrupt Energy should either create a hit OR create a rotation that gives you map control.
3 Trap Patterns That Actually Work
Most trap guides fail because they list “put traps at chokepoints” without explaining which chokepoints matter. These three patterns are repeatable across maps.
Pattern A: The Return-Line Trap (Best Against Smart Survivors)
Smart survivors rotate wide once they know you’re John Doe. They still have to “return” to objectives. Trap the return.
- •Pick the safest mid-map lane survivors use to return to objectives after they break chase.
- •Place a Footprint where they must look forward (a corner exit, a doorway, a stair top).
- •Force them away with Corrupt Energy, then rotate away so they think the lane is safe again.
- •When they return, they hit the trap because they stop scanning behind them.
Pattern B: The Rescue Funnel (Wins Endgames)
Survivors are predictable on rescues: they approach from the side with cover and they leave toward the nearest safe tile.
- •Trap the covered approach line first (the “sneaky” side), not the obvious open line.
- •Use Corrupt Energy to block the clean exit lane so the rescuer must path through your trap zone.
- •Do not tunnel the downed survivor automatically; punish the rescuer and you create a snowball.
- •If two survivors come, rotate instead of over-committing—your trap network does the work.
- •In endgame, this pattern often decides the match because survivors stop thinking and start sprinting.
Pattern C: The Two-Tile Link (Anti-Split Pressure)
When survivors split objectives, they rotate between two tiles. Trap the link between those tiles.
- •Identify the “pair” of objectives survivors keep bouncing between.
- •Place a Footprint on the connecting lane, then place your third trap near the safer of the two tiles.
- •Use Corrupt Energy to deny the “safe escape” so they choose the connecting lane more often.
- •Your goal is to make rotating feel dangerous; survivors waste time creeping instead of progressing.
- •Refresh these traps whenever you notice survivors moved the split to a new side of the map.
What Survivors Do To Counter John Doe
Good survivors slow down before corners, rotate wider, and “probe” lanes to bait your traps. If you feel like your traps never hit, you are probably over-placing them on obvious routes. Start trapping return lines and rescue funnels, then let survivors walk into them while you pressure elsewhere.
Mini FAQ (Fast Answers)
A few quick answers that stop common misplays.
Should I chase the best looper?
Only if that chase stays inside your trap network.
- •If the looper pulls you away from your setups, you’re losing time twice: you’re not getting hits and you’re not protecting objectives.
- •John Doe often wins by farming two weaker survivors while the looper wastes time trying to “take aggro”.
When do I refresh traps?
When survivors stop stepping on them.
- •If 2–3 minutes pass without a trap payoff, survivors likely adapted; move them to a new return line.
- •Refreshing is not “downtime”—it’s how John Doe stays threatening.
Sources (Verify Live Values)
For exact live ability text and balance changes, check in-game tooltips first. These references are helpful for ability values and update history:
References
External links:
- •Forsaken (Roblox): https://www.roblox.com
- •Community Wiki (Forsaken2024): https://forsaken2024.fandom.com/wiki/Forsaken_Wiki
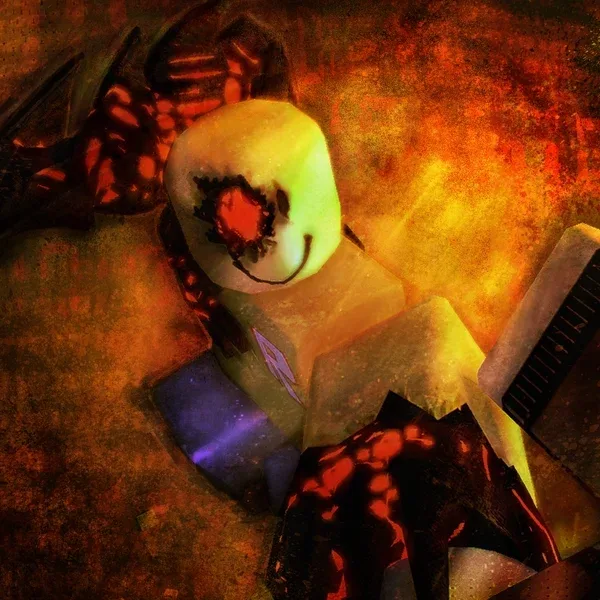
John Doe as they appear in Forsaken. Image: Forsaken (Roblox) © Forsaken Dev Group, via the FORSAKEN Wiki on Fandom.
Final Thoughts
John Doe is at his best when you stop playing “fair” chases and start playing a map-control match. Place traps early, wall committed lanes, and rotate so survivors feel unsafe everywhere. Once the lobby starts hesitating, your traps become free damage and your endgames become clean.
- • Place 2 Digital Footprints before committing to long chases.
- • Use Corrupt Energy on committed lanes to force predictable turns.
- • Trap return lines and rescue funnels, not obvious objectives.
- • Refresh traps as soon as survivors adapt.
Next up: Noli, Chance, Two Time, and more keyword guides.
Corrupt Energy, Digital Footprint, and area denial
John Doe costs 1,000 Player Points and plays as a control killer rather than a chase killer. Corrupt Energy and Digital Footprint are both about trapping and dividing the survivor team, cutting people off from each other and setting up an ambush on someone who is now isolated. In the fiction he is a former Roblox HQ worker corrupted by a paranormal force, which is the thread linking him to the Roblox HQ map.
Area denial is only worth something if it denies an objective. Survivors take three seconds off the four-minute clock per completed puzzle layer, twelve for a whole generator, and a full minute if all five fall. A trap placed on a route nobody needs has cost you setup time for nothing; the same trap between a survivor and the generator they were about to resume is doing the work the kit was designed for.
The generator minigames reset if interrupted, which is what makes division so strong on this character. Splitting a survivor away from a puzzle they were partway through does not merely pause their progress, it costs them the layers they had not yet banked.
Corrupt Energy on the Roblox HQ map
John Doe is thematically tied to Roblox HQ — in the fiction he is a former worker there, corrupted by a paranormal force — and the map rewards his kit for structural reasons rather than narrative ones. Partitioned interiors give Digital Footprint and Corrupt Energy defined routes to cut, which is where division kits extract the most value. The one map without generators is SFOTH, a private-server-only map with no objectives at all, so in public matchmaking every map has generators to work; Generator Hell, also private-server-only, uses an older square-flipping generator design.
Eliminating a survivor extends the four-minute clock, but interrupting one deletes banked generator layers outright, since the puzzles regenerate when broken. On a four-layer generator that is a larger swing than most chases produce. Player Points come only from public matchmaking, and they come from contribution rather than survival time — a generator puzzle layer pays 5 Player Points and 15 EXP, and a generator is four layers deep. Private servers award nothing at all, which makes them a place to rehearse rather than a place to grind.
Related Forsaken Guides
Forsaken Codes (2026): Why There Are None & How Free Rewards Really Work
Forsaken codes don't exist — the game has no redemption system. Here's why, how to spot fake code lists, and every real way to earn free rewards in 2026.
Guest 666 Forsaken Guide: Stats, Pressure Gameplan & Counters (2026)
Guest 666 Forsaken guide: wiki stats — 2,750 HP, 27 run speed, Burst / Snowball — the pressure gameplan that wins rounds, and the survivors that actually counter him.
Roblox HQ Map Forsaken: Full Guide to the Office-Floor Hunt (2026)
Roblox HQ map Forsaken guide: how the office-floor web really plays, chain-routing for survivors, cutoff play for killers, and who over-performs here.
Forsaken Items Guide 2026: Every Item, and Why There Are No Perks
Forsaken items guide: all 13 documented items, which 2 spawn in public rounds, how the status effect system works, and why Forsaken has no perks.
Builderman Forsaken Survivor Guide 2026: Sentries, Dispensers & Why He Is Not a Killer
Builderman Forsaken survivor guide: Sentry and Dispenser explained, 500 Player Points cost, placement strategy, and why he is a Support Survivor and not a killer.
Back to the ForsakenHub homepage for the full Forsaken Roblox guide hub, or browse all guides. You can also play the game directly on Forsaken on Roblox.