How to Get John Doe in Forsaken: Cost, Player Points & What He Does (2026)
How to get John Doe in Forsaken: he costs 1,000 Player Points in the shop, earned only in public matches. How points work, how long it takes, what his kit does, and how to get his skins.
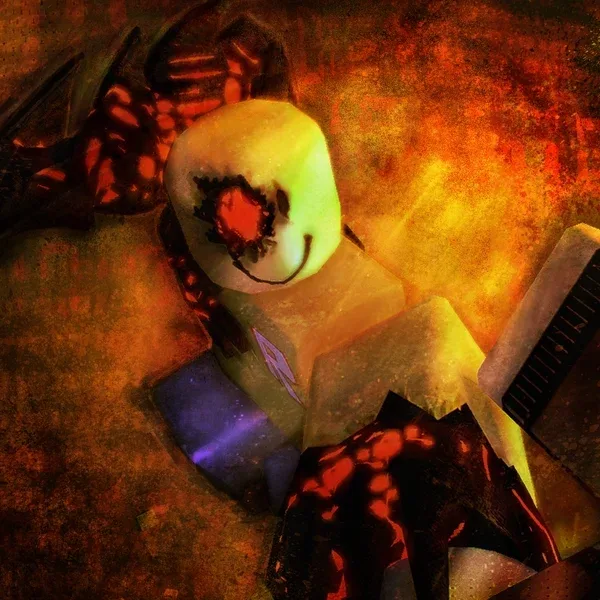
John Doe — bought in the shop for 1,000 Player Points. Image: Forsaken (Roblox) © Forsaken Dev Team, via the Official Forsaken Wiki.
How to get John Doe in Forsaken: open the shop in the lobby and buy him for 1,000 Player Points. There is no quest, no badge, no code and no Robux shortcut — you earn the points by playing public matches, and this page shows exactly what each action pays so you can plan the purchase. If you searched how to get John Doe in Forsaken expecting a hidden requirement, the honest answer is a price tag. The Official Forsaken Wiki lists John Doe as a killer that can be obtained by paying 1,000 in the shop, using the Player Points currency the game awards for surviving, completing generator puzzles, landing abilities and winning as the killer. That makes the real question "how fast can I earn 1,000 Player Points," and the wiki publishes the exact payout table, so this guide is built around it. Below you will find the price and where to pay it, every documented source of Player Points, a worked estimate of how many rounds the unlock takes in a realistic mix of results, what John Doe actually does once you own him — Corrupt Energy, Digital Footprint, 404 Error and two passives — and what still has to be unlocked after the purchase, including the Treachstone skin that a separate collaboration badge controls. Nothing here is guessed: every number is the wiki figure as of September 2026, and where the wiki is silent this page says so rather than filling the gap.
The price, and where you pay it
John Doe sits in the lobby shop with the other purchasable killers. His cost is 1,000 Player Points, the same currency used for every survivor, killer, skin and emote in the game. For comparison, the wiki lists Noli at 1,100, 1x1x1x1 at 1,250, Guest 666 at 1,666 and Nosferatu at 1,922, while c00lkidd and Slasher are free. John Doe is therefore the cheapest killer you have to pay for, which is part of why he is many players' first purchase.
What Player Points are
Player Points are the in-game currency. The wiki describes them plainly: players earn them by performing actions in-game like completing puzzles, using abilities and surviving. They are not bought with Robux on any page the wiki documents, and there is no redeem-code system in Forsaken — every "free John Doe code" video is bait. The only way to the 1,000 is to play.
Public matches only
The wiki is explicit that players are unable to earn Player Points in private servers. A private server is still the right place to learn a killer or a map, but every round there pays nothing toward John Doe. If your goal is the unlock, queue public.
Every Player Points Source the Wiki Documents
This is the payout table from the Official Forsaken Wiki's Player Points page, condensed. Round rewards apply to anyone; character rewards only when you are playing that character.
| Action | Player Points | Notes |
|---|---|---|
| Survive to the end of a round (any survivor) | +40 | The single biggest survivor payout |
| Die as a survivor after living at least 60 seconds | +10 | Dying inside the first minute pays nothing |
| Complete one generator puzzle layer | +5 | Four layers per generator; also 15 EXP and 0.5 Malice each |
| Heal a survivor inflicted with Hemorrhage by Guest 666 | +10 | Survivor round reward |
| Kill every survivor before time runs out (killer) | +60 | On top of the per-kill rewards |
| Kill a survivor / kill with damage over time / fail to kill everyone (killer) | +15 each | Listed together on the wiki at the same value |
| Shedletsky stuns the killer with Slash | +5 | Character reward |
| Elliot heals a survivor with Pizza Throw | +8 | Character reward |
| Guest 1337 blocks an attack / punches and stuns | +3 / +5 | Character rewards |
| Dusekkar shields a survivor from death with Spawn Protection | +10 | Highest single ability reward for a survivor |
| c00lkidd: pizza bot hit / Corrupt Nature or Walkspeed Override hit / kill with Walkspeed Override | +4 / +8 / +12 | Free killer — the natural way to fund John Doe |
| Slasher: Behead hit / Gashing Wound hit / kill with Behead | +4 / +8 / +12 | Free killer |
| John Doe: Corrupt Energy hit / Digital Footprint triggered / kill with Corrupt Energy | +4 / +8 / +12 | What he pays once you own him |
Source: Official Forsaken Wiki, Player Points page, read 9 September 2026. The wiki marks the page as under investigation and still adding Azure rewards, so treat rare-event values as subject to change.
How many rounds it actually takes
Nobody survives every round, so the useful estimate is a blend. The arithmetic below uses only the table above; it is not a measured average, because the wiki does not publish one and neither do we.
A good survivor round
Survive the four minutes (+40) and complete four generator layers along the way (+20). That is 60 Player Points before any character reward. At that rate the unlock is 17 rounds — about 17 four-minute rounds plus lobby time, so an evening.
A typical survivor round
Die after the first minute (+10) with two layers banked (+10). Twenty Player Points, or 50 rounds to reach 1,000. Realistic play sits between the two cases, which puts most players at roughly 25 to 35 public rounds for the purchase — a few sessions rather than a grind measured in weeks.
Funding him as a killer
The free killers pay well. A c00lkidd round that eliminates all four survivors is worth 60 for the wipe plus 15 per kill, plus 4 to 12 for each documented ability reward, so a strong killer round can clear 150 Player Points on its own. Killer rounds are assigned rather than chosen, so you cannot queue exclusively for them — but you can leave "Disable Being Killer" off in settings so you are eligible.
Pro Tip
Bank layers, do not hoard them. Player Points for a generator are paid per completed layer, and an interrupted puzzle regenerates its wires from scratch. Two survivors finishing two layers each on separate generators pays the same 20 Player Points as one survivor finishing a whole generator — and the killer has to be in two places to stop it.
What you get: John Doe's kit, from the wiki
The wiki classes John Doe as a Trapper / Setplay killer — one who applies pressure by cornering survivors and by pre-placing abilities — and rates his difficulty 5 out of 5. His infobox lists 2,300 HP, 9 walk speed, 27.25 run speed, 110 stamina and a 75-stud terror radius. Every survivor runs at 26, so like every killer he closes distance slowly and wins through the kit rather than the sprint.
Slash and Corrupt Energy
Slash is the basic attack: 28 damage, 1.75-second cooldown, 7.5-stud reach. Corrupt Energy is the signature: after a windup of about 2.2 seconds he punches his corrupted arm into the ground and 31 giant spikes erupt in front of him for 14 seconds, each spike dealing 10 damage with a cap of 30 per survivor. Hitting a survivor gives him Speed I, the spikes can be dropped early by pressing the button again, and they double as walls that block routes. Cooldown 18 seconds.
Digital Footprint and 404 Error
Digital Footprint leaves a false shadow under his footsteps as a trap. A survivor who steps on it takes Corrupted I and Slowness II, John Doe gains Speed I, and both players' auras are revealed to each other for 10 seconds. 404 Error pulses his corrupted arm twice and reveals the auras of every living survivor for 6 seconds on a 20-second cooldown — the information tool that tells you where to put the spikes.
Two passives
Natural Malevolence leaves a trail of corruption behind every step; a survivor who walks into it takes Corrupted II. Unstoppable limits stuns to 2 seconds while he is casting Corrupt Energy or 404 Error, then gives him Speed I with a roar when the stun ends, halves incoming negative status durations until that speed fades, and cuts the interrupted ability's cooldown in half.
Who he is
In the game's lore John Doe was a worker at Roblox HQ — the map added in 5.0.0 — before a parasite hiding in faulty code corrupted him. He is based on the John Doe Roblox account and the myths around it, which is why his shop quote is "DON'T PLAY ROBLOX ON MARCH 18TH?!?!". The full matchup guide is at /blog/forsaken-john-doe-killer-guide.
There is no other way to get John Doe. No code, no badge, no quest, no purchase with Robux and no private-server farming — the wiki documents the shop price and the public-match currency, and nothing else. Any video or site claiming a "free John Doe method" is either describing a skin unlock (see below) or making it up.
After the purchase: skins, EXP and Treachstone
Buying John Doe unlocks the character, not his wardrobe. His update history on the wiki lists 41 skins, and they arrive three different ways.
Shop skins and milestone skins
Most skins are bought with Player Points in the shop. The Milestone skins are different: each character earns EXP separately, the first Milestone skin unlocks at level 25, and levels cap at 100. Every generator layer pays 15 EXP and every Corrupt Energy hit 36, so John Doe levels himself as you play him.
The collaboration skins
Update 5.0.0 added John Flow, John Dog and Treachstone. Treachstone is not bought at all: it unlocks through the Roblox badge CHAPTER III - SYSTEM DELETED in the collaboration game The Battle Bricks, earned by beating Chapter 3 "Machine Scream" on Tumore Mode. Our step-by-step is at /blog/how-to-get-treachstone-john-doe-forsaken, and the full list of all 41 skins is at /blog/all-john-doe-skins-forsaken.
Final Thoughts
John Doe costs 1,000 Player Points in the lobby shop, earned only in public matches: 40 for surviving a round, 10 for dying after the first minute, 5 per generator layer, 60 for a killer wipe plus 15 per kill, and 3 to 12 for the documented ability rewards. A realistic mix of results puts the unlock at roughly 25 to 35 rounds. What you buy is a 5/5-difficulty Trapper with 2,300 HP whose 31 Corrupt Energy spikes, Digital Footprint traps and 404 Error aura reveal reward planning over chasing — and whose 41 skins, including the badge-locked Treachstone, are a separate project.
- • Price: 1,000 Player Points in the shop — the cheapest paid killer
- • Player Points come only from public matches; private servers pay nothing
- • Best payouts: +40 survive, +60 killer wipe, +5 per generator layer, +15 per kill
- • Kit: Slash 28, Corrupt Energy (31 spikes, 14s, 18s cooldown), Digital Footprint trap, 404 Error reveal (6s, 20s cooldown)
- • Treachstone skin is a Battle Bricks badge, not a purchase
Learn to play him with /blog/forsaken-john-doe-killer-guide, compare every killer's price and kit on /forsaken-killers, and check his current ranking at /forsaken-tier-list.
Related Forsaken Guides
Forsaken Medkit Guide: Healing Strategies for the Real Item System (2026)
Forsaken medkit guide: the Medkit heals 80 HP over 7 slowed seconds and is one of only two items that spawn in public rounds. Elliot's Pizza Throw, Dusekkar's shield, Hemorrhage, and when to heal vs work the generator.
Nosferatu Forsaken Guide 2026: 4 Abilities, Bloodhook Combos, Counter
Nosferatu in Forsaken 2026: Bloodhook + Cataclysm + Hunter's Feast + Ascension explained, the M1-cooldown combo, and the best survivor counter ranked.
Best Support Survivors in Forsaken: Elliot vs Shedletsky vs Chance vs Two Time
Support meta guide for Forsaken. Learn how to play Elliot, Shedletsky, Chance, Two Time, plus when to pick 007n7 and Noob for intel and clutch saves.
1x1x1x1 Forsaken Guide 2026: All 4 Abilities Ranked + Best Counter
1x1x1x1 in Forsaken: all 4 abilities ranked, the exact combo that wins chases, the 1 survivor that hard-counters him, and 2026 patch changes.
John Doe Forsaken Guide 2026: All Abilities, 3 Folders & Counter
John Doe in Forsaken 2026: all 4 abilities, where to find the 3 folders, Corrupt Energy timing, and the best survivor counter ranked by win rate.
Back to the ForsakenHub homepage for the full Forsaken Roblox guide hub, or browse all guides. You can also play the game directly on Forsaken on Roblox.